# mDash Smart Light
This article describes an implementation of a full, functional
commercial IoT product under a commercial-friendly Apache 2.0 license. It can
be used as a reference for creating similar smart products.
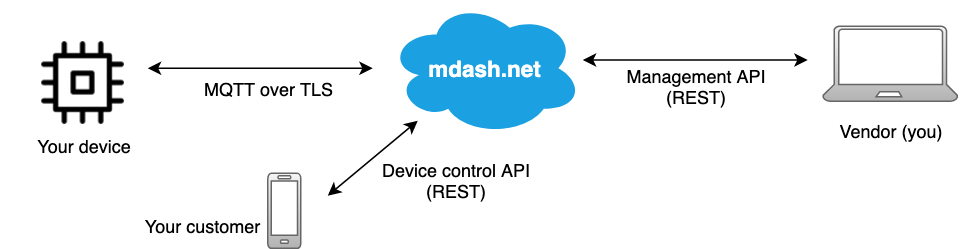
This project implements a smart light. For the hardware, we use an ESP32
development board with an LED, which serves as a light. The devboard can be
"shipped" to a customer. A customer provisions it using a mobile app. You, as
a vendor, have full control over all "shipped" products, including device
dashboard with OTA firmware updates, remote management and usage statistics.
# Step-by-step guide
---
### 1. Setup ESP32 device
Get an ESP32 board. If your board does not have a built-in LED,
attach an LED to one of the IO pins. Connect your ESP32 device to your
workstation via a USB cable.
### 2. Setup Arduino IDE
Start Arduino IDE. Make sure it has mDash library installed. If not,
 - [Install ESP32 support in Arduino IDE](https://randomnerdtutorials.com/installing-the-esp32-board-in-arduino-ide-windows-instructions/)
- Install mDash library:
- Select "Sketch" → "Include Library" → "Manage Libraries"
- In the search field, type "mDash" and press Enter
- Click on "Install" to install the library
### 3. Compile and flash firmware
Clone Smart Light reference repository:
```sh
git clone https://github.com/cesanta/mdash-smart-light.git
```
Open `mdash-smart-light/firmware/SmartLight.ino` in the Arduino IDE.
Compile and upload the sketch to your device.
> Notice that the sketch does not contain WiFi or cloud credentials.
> That means that a compiled sketch could be used to OTA (over-the-air)
> update multiple devices, since the credentials are not hardcoded into
> firmware code, but stored in a configuration file instead.
### 4. Setup cloud credentials
There two types of credentials stored on a device:
- WiFi credentials: used to join WiFi network and get out to Internet
- cloud credentials: used to login to mDash
For this Smart Light project, we will set up the WiFi network credentials using
the mobile app. The Cloud credentials we set up right now via Serial console.
Both WiFi and cloud credentials are stored in the `mdash.cfg` configuration
file. Mobile app and serial console are just different methods in setting
values in the configuration file. If you decide to implement some other custom
method, for example via the NFC tag, just save the result
in the `mdash.cfg` - see
[mDashConfigSet](https://mdash.net/docs/api/lib.md#mdashconfigset-set-configuration-parameter) API.
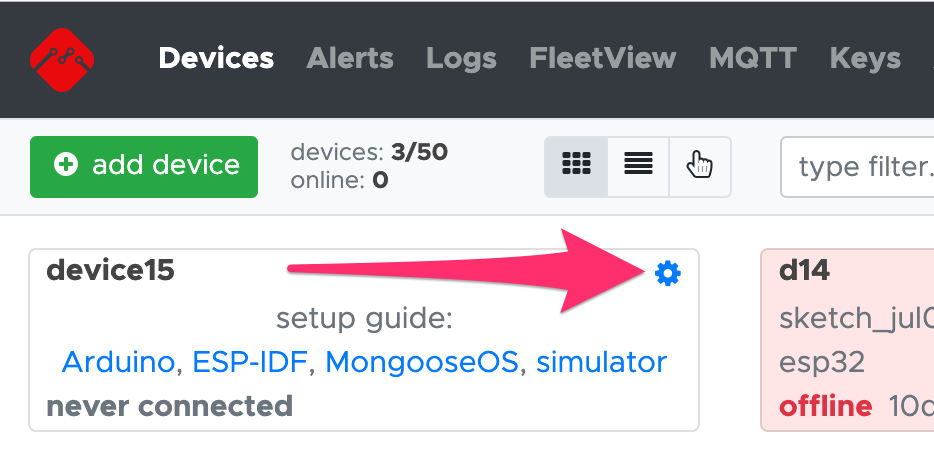
Login to https://mdash.net and register a new device.
Click on device settings icon to see device token (password):
- [Install ESP32 support in Arduino IDE](https://randomnerdtutorials.com/installing-the-esp32-board-in-arduino-ide-windows-instructions/)
- Install mDash library:
- Select "Sketch" → "Include Library" → "Manage Libraries"
- In the search field, type "mDash" and press Enter
- Click on "Install" to install the library
### 3. Compile and flash firmware
Clone Smart Light reference repository:
```sh
git clone https://github.com/cesanta/mdash-smart-light.git
```
Open `mdash-smart-light/firmware/SmartLight.ino` in the Arduino IDE.
Compile and upload the sketch to your device.
> Notice that the sketch does not contain WiFi or cloud credentials.
> That means that a compiled sketch could be used to OTA (over-the-air)
> update multiple devices, since the credentials are not hardcoded into
> firmware code, but stored in a configuration file instead.
### 4. Setup cloud credentials
There two types of credentials stored on a device:
- WiFi credentials: used to join WiFi network and get out to Internet
- cloud credentials: used to login to mDash
For this Smart Light project, we will set up the WiFi network credentials using
the mobile app. The Cloud credentials we set up right now via Serial console.
Both WiFi and cloud credentials are stored in the `mdash.cfg` configuration
file. Mobile app and serial console are just different methods in setting
values in the configuration file. If you decide to implement some other custom
method, for example via the NFC tag, just save the result
in the `mdash.cfg` - see
[mDashConfigSet](https://mdash.net/docs/api/lib.md#mdashconfigset-set-configuration-parameter) API.
Login to https://mdash.net and register a new device.
Click on device settings icon to see device token (password):
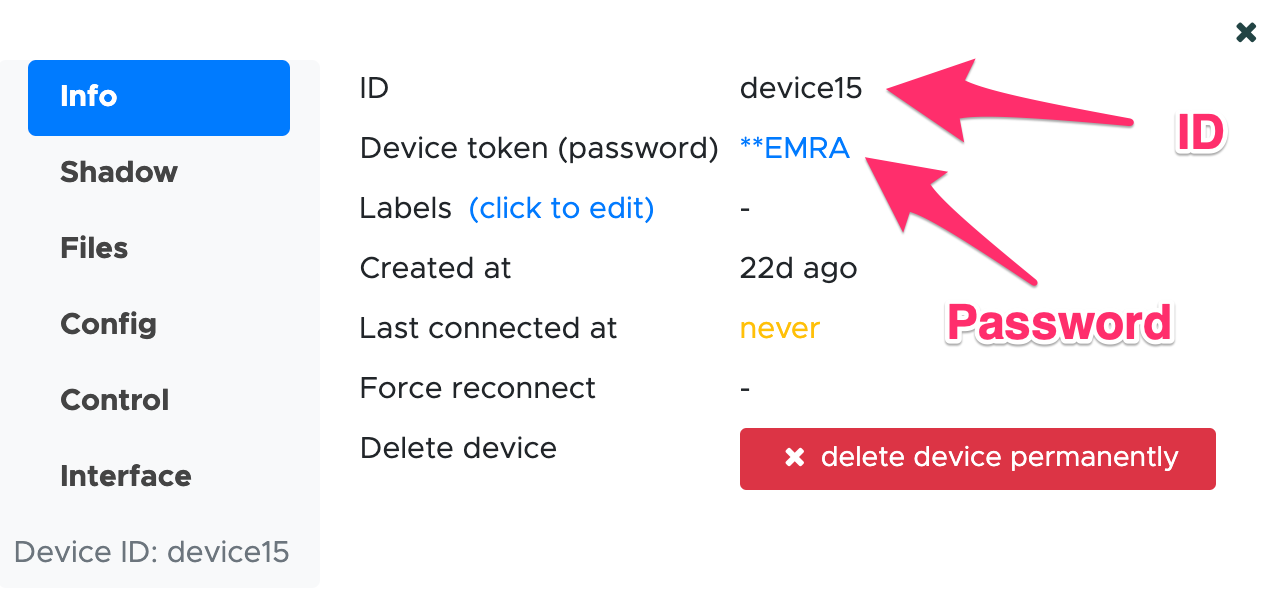
In Arduino IDE, start Serial Monitor. In the Serial monitor input field, type
the following command to save the device token (password) and press enter:
```sh
set device.pass DEVICE_PASSWORD
```
Let us repeat: the cloud credentials are saved into the `mdash.cfg`
configuration file on a device's filesystem. When a device boots, it looks for
WiFi and cloud credentials in that file. While all binary firmwares on all your
devices will be the same, the configuration files will be different.
In order to factory-reset a device, the WiFi credentials should be deleted
from the `mdash.cfg` using `mDashConfigSet()` function.
Now it is time to configure [device ACL](../userguide/security.md#acl) to
define what a customer can do with a device, and what cannot do.
Click on device settings icon, choose "ACL" tab, and modify the
`shadow_read` and `shadow_write` values:
```json
{
"shadow_read": "^.state.reported.(online|led|pin|name)",
"shadow_write": "^.state.desired.(led|pin|name)",
"rpc": "",
"public_key": "DO NOT MODIFY THIS!",
"publish_data": false
}
```
Click save. We just have given our mobile app some restricted permissions to
access our device.
### 5. Mobile app overview
Now cloud credentials are set up, and your device is ready to be
shipped to a customer. Customer gets a physical device and a mobile app
to setup and control that device.
The mobile app in this reference project uses
[PWA technology](https://en.wikipedia.org/wiki/Progressive_web_applications),
i.e. it is a progressive web app. It is written using
[Bootstrap](https://getbootstrap.com/) and [Preact](https://preactjs.com/).
Simply open `mdash-smart-light/mobile-app/index.html` file in your browser
to see how it looks like. You can modify it as you wish.
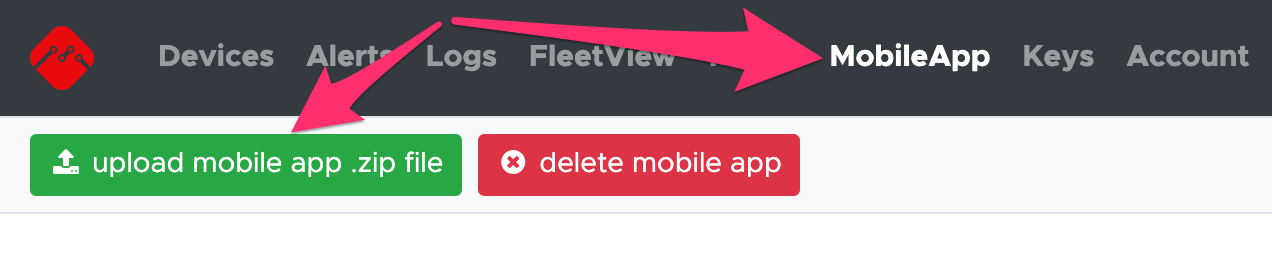
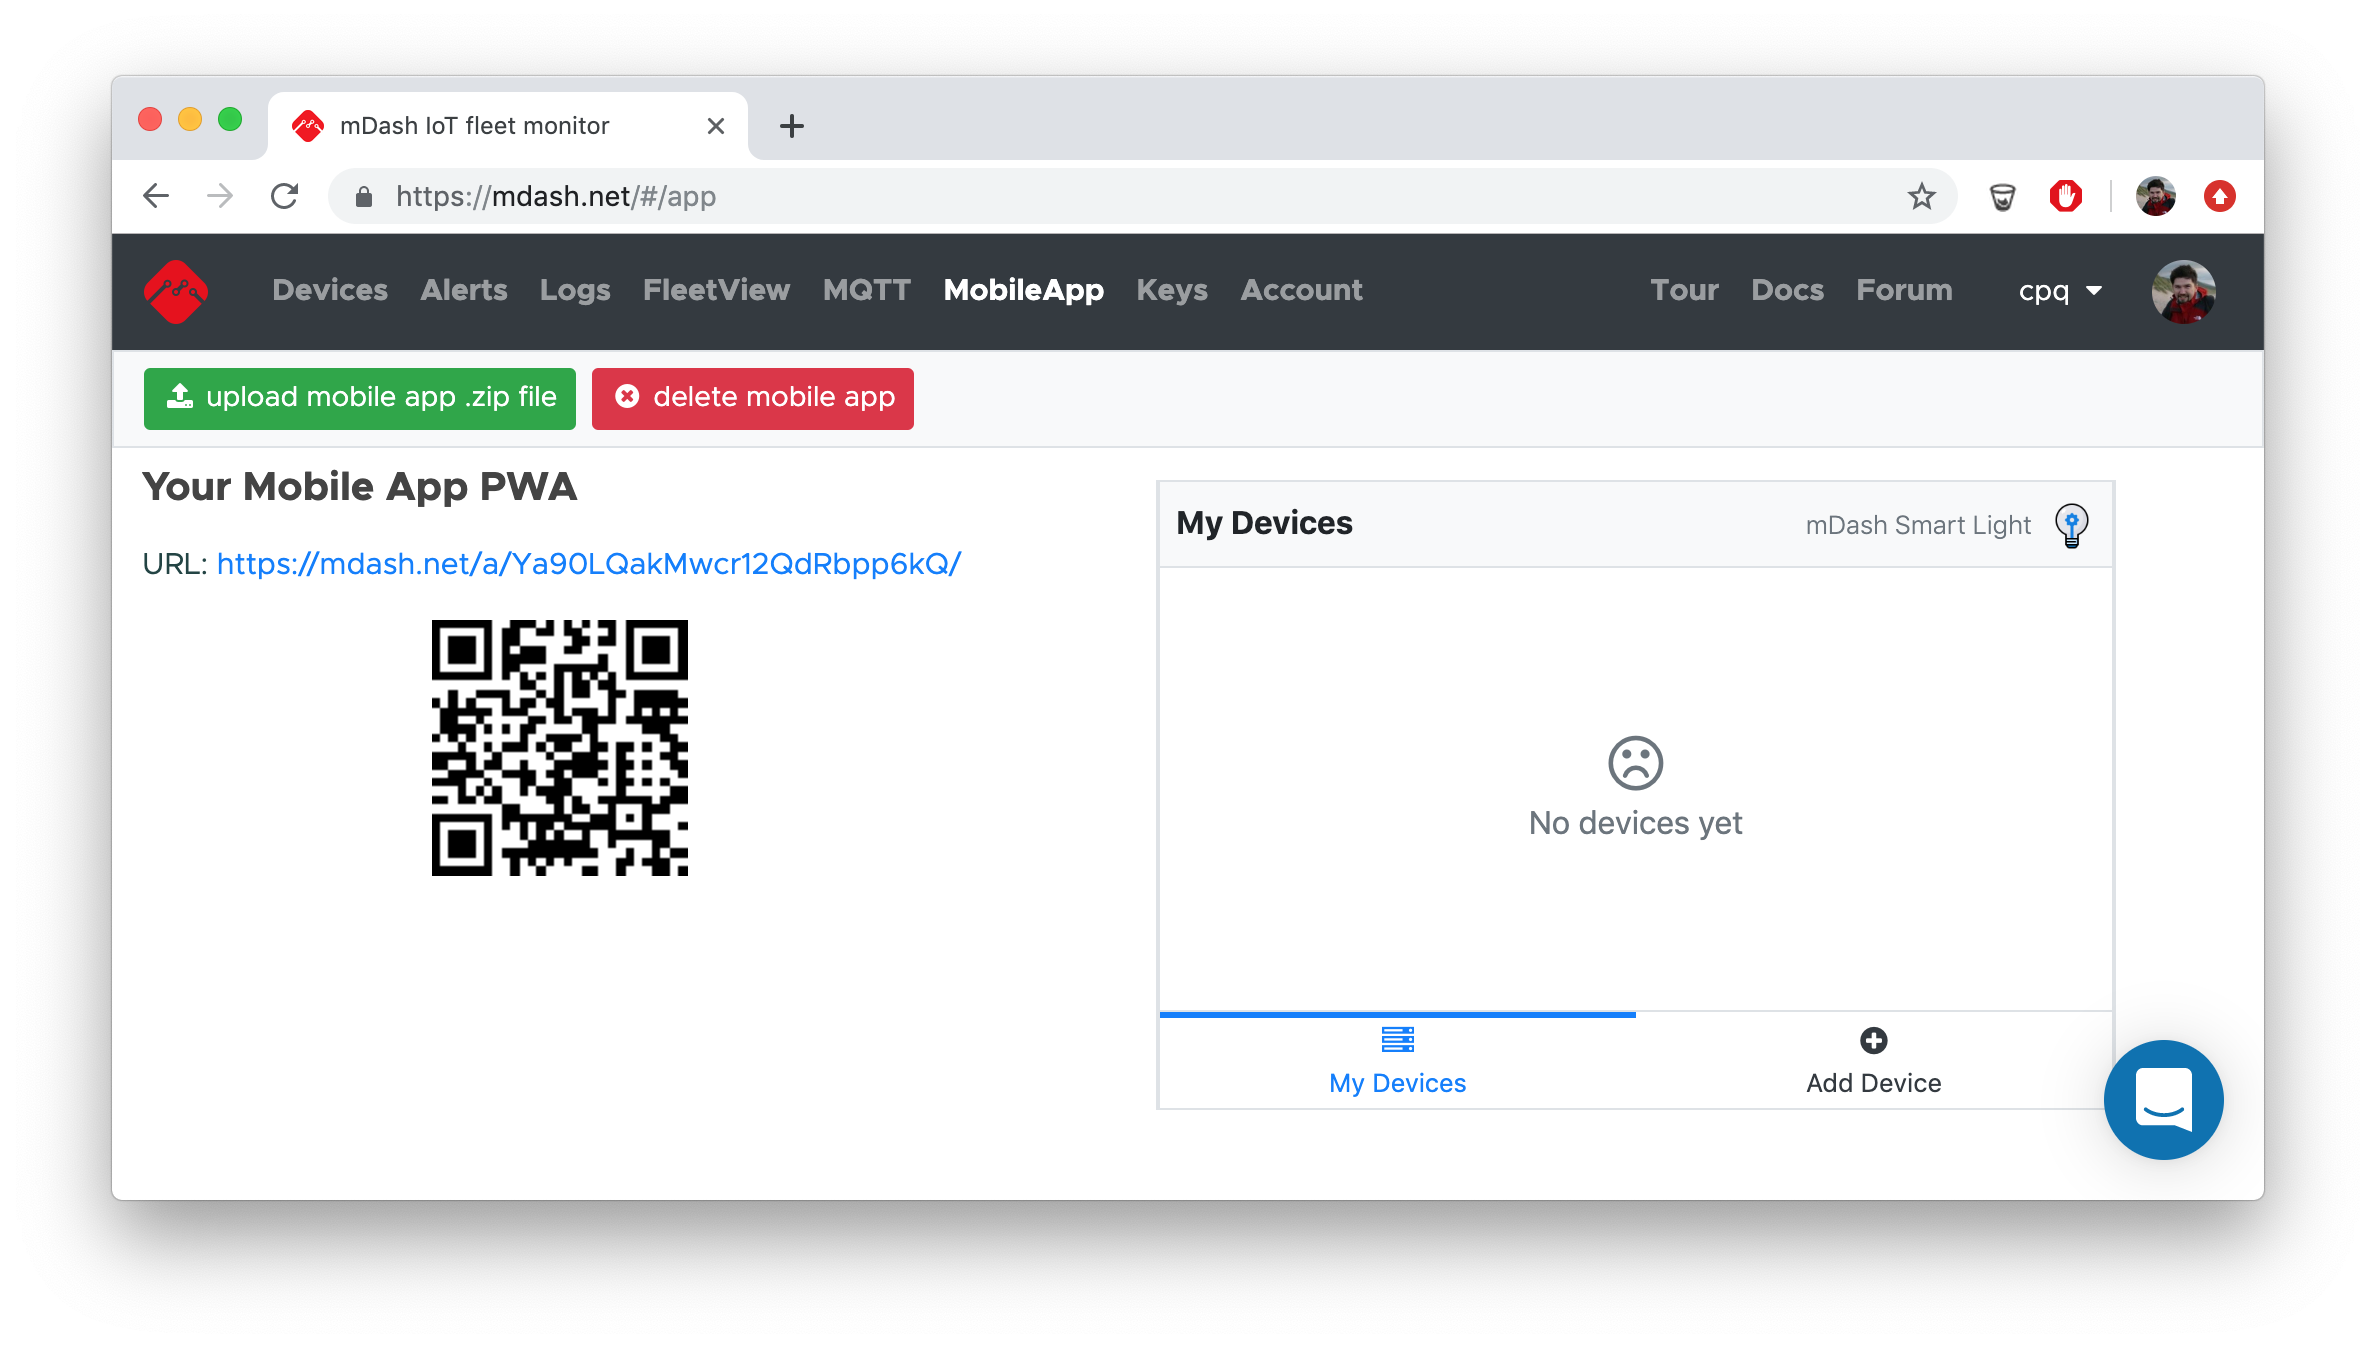
Zip the `mdash-smart-light/mobile-app` directory. On the mDash UI,
go to "MobileApp" tab and upload the .zip file. mDash will assign a unique
URL to your app, and start serving it:
> If you would like to go with a native mobile application for Android /
> iPhone, take a look at the `mdash-smart-light/mobile-app/js/app.js` logic
> on how the device setup process works, and duplicate it in the native app.
> For production, modify this PWA according to your needs, and upload to
> mDash or your own website. Share the URL / QR code with your customers.
### 6. Install mobile app
Now we act as a customer.
Open mDash "MobileApp" tab. You should see your uploaded app and a QR code:
It is now time to install the mobile app on your phone:
- **Install mobile app on iPhone**
- Open the Camera app
- Hold your phone so the QR code appears on the camera view
- Click on the "Open in Safari" popup: 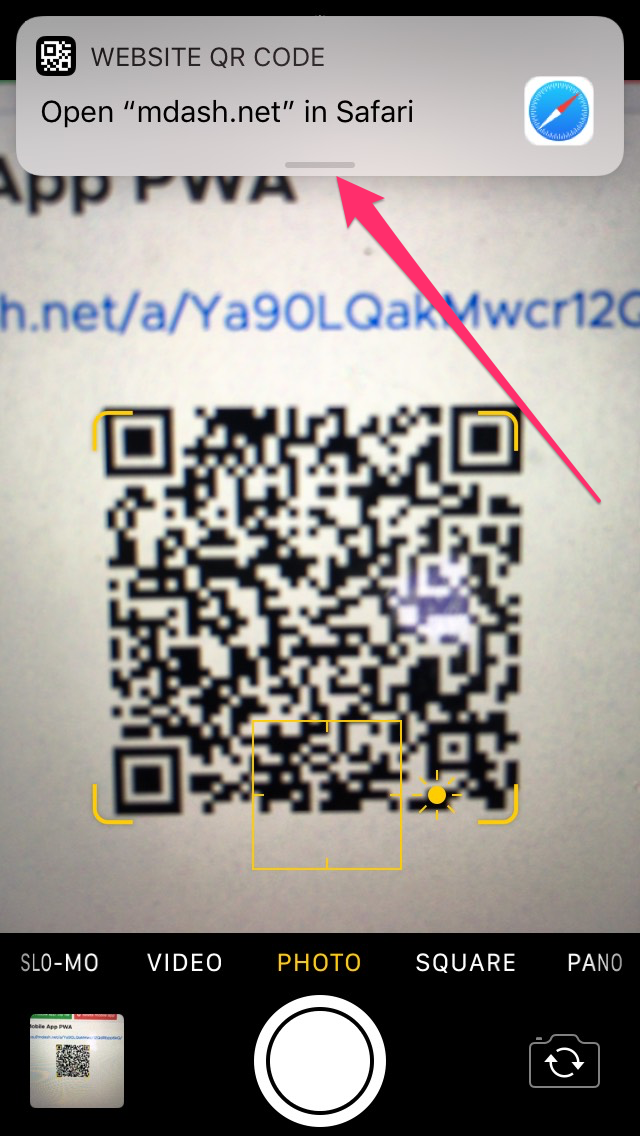 - When the app is openen in Safari, click on the Share button:
 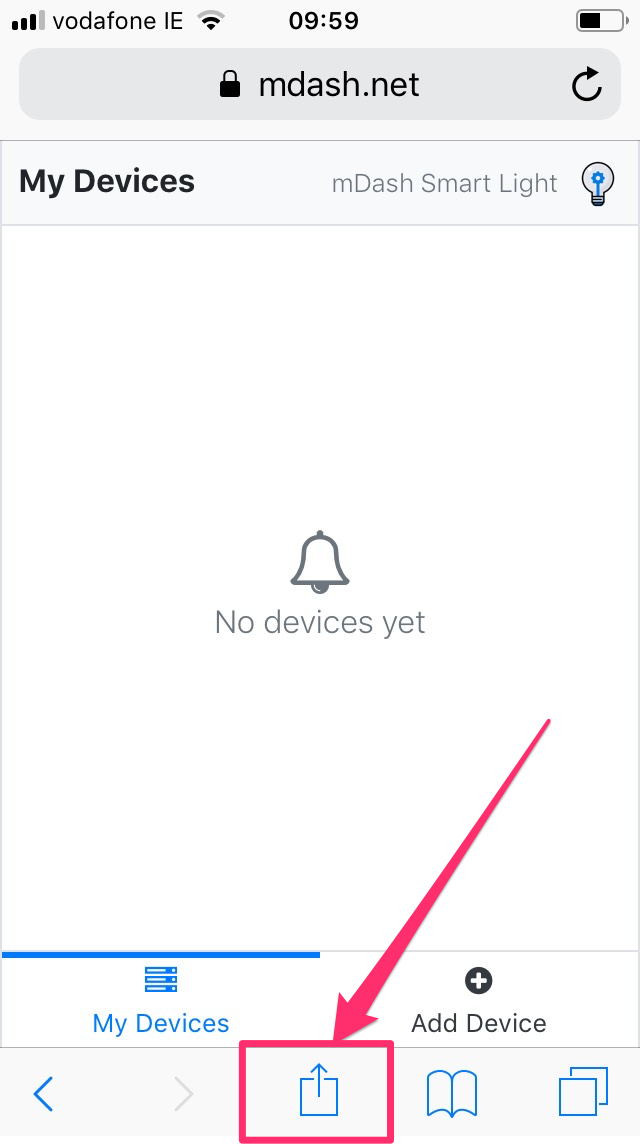 - Click on "Add to Home Screen":
 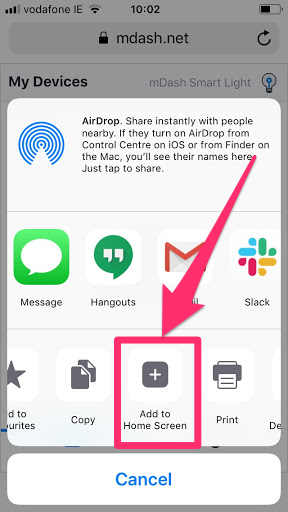 - Click on "Add" to complete the installation:
 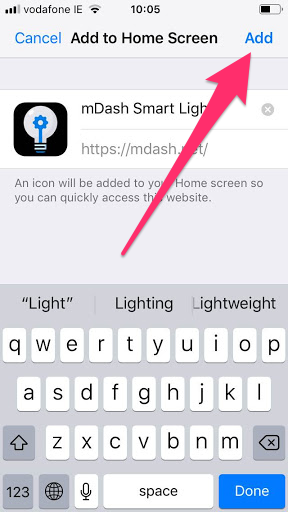 - The app appears on home screen. Installation is complete! Click on the icon to open the app:
 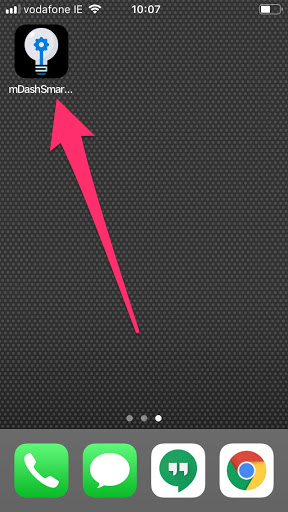 - **Install mobile app on Android**
- Scan the QR code in any QR code scanning application:
- **Install mobile app on Android**
- Scan the QR code in any QR code scanning application: 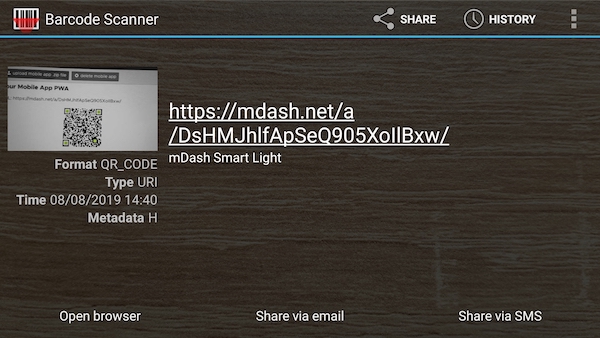 - When a page opens in a brower, click on the triple dot, and choose "Add to home screen" menu item:
 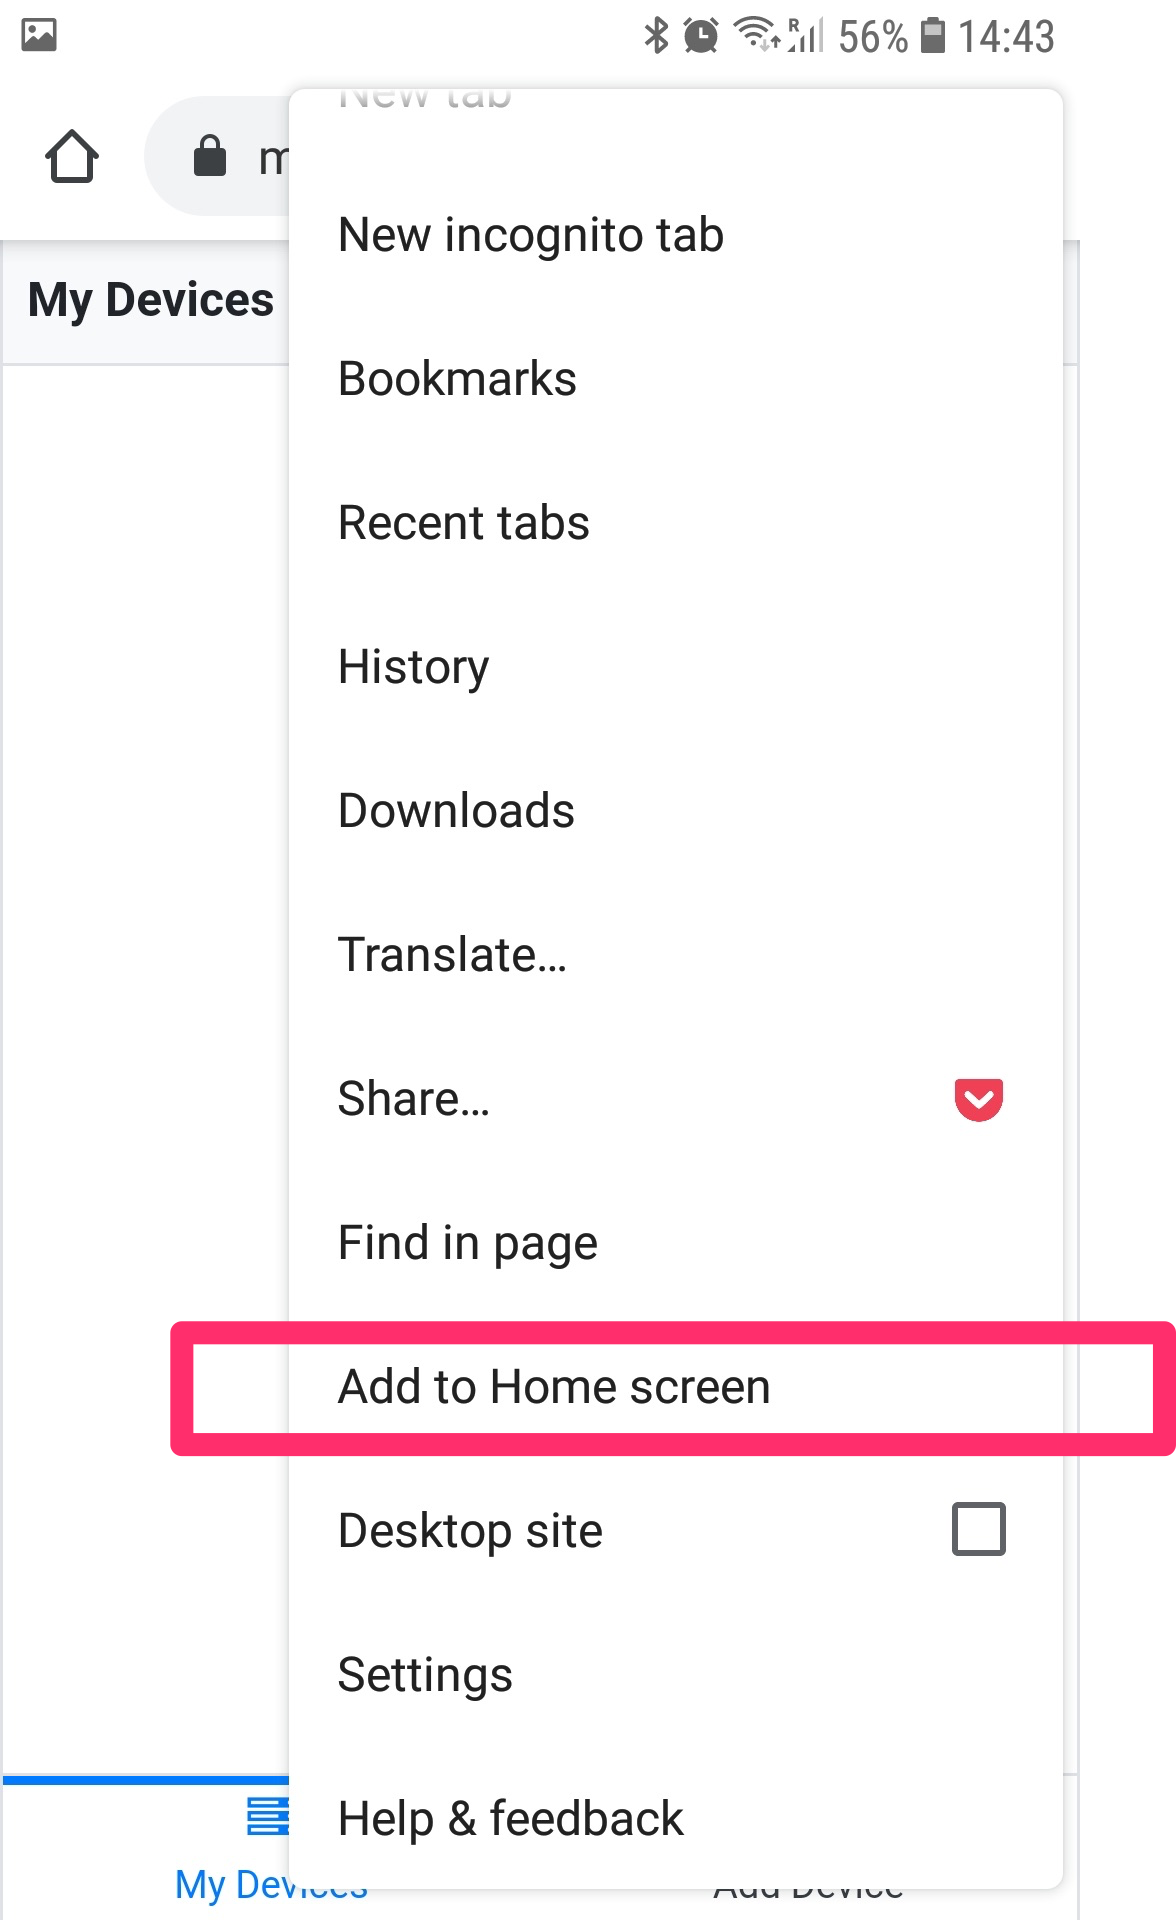 ### 7. WiFi setup
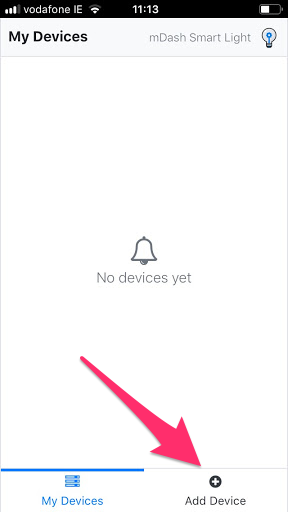
Initially, there are no devices in the list. Click on "Add device":
### 7. WiFi setup
Initially, there are no devices in the list. Click on "Add device":
 Then follow the instructions to add a device. That involves temporarily
changing the phone's WiFi network to communicate directly with the device (will
need to scan for the device Access Point using phone's options in Settings)
then when back in the app you'll scan for the device and then enter your WLAN's
network name (SSID) and password.
During that procedure, the app:
- Downloads an access key from a device. Later on, the app will use
that key to fetch device info from mDash and control the device
- Sends WiFi credentials to the device. Device joins WiFi network on a
customer's site, and connects to mDash.
### 8. Device control
Once the device provisioning procedure is complete, you should see an
added device as online:
Then follow the instructions to add a device. That involves temporarily
changing the phone's WiFi network to communicate directly with the device (will
need to scan for the device Access Point using phone's options in Settings)
then when back in the app you'll scan for the device and then enter your WLAN's
network name (SSID) and password.
During that procedure, the app:
- Downloads an access key from a device. Later on, the app will use
that key to fetch device info from mDash and control the device
- Sends WiFi credentials to the device. Device joins WiFi network on a
customer's site, and connects to mDash.
### 8. Device control
Once the device provisioning procedure is complete, you should see an
added device as online:
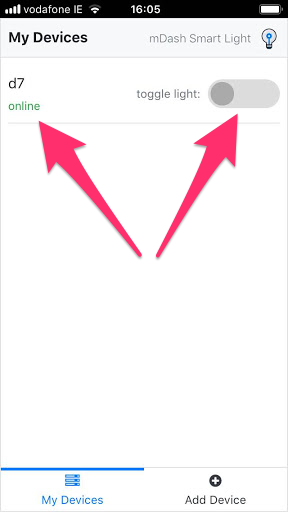 Use the toggle button to turn device on and off. The LED on the board should
correspondingly switch on and off. If an LED does not react, then probably
the issue is with the LED pin, which should be set to a correct value.
Go to the mDash "Devices" tab, click on the device settings, choose "Shadow".
Set the `state.desired.pin` in the shadow editor and save:
Use the toggle button to turn device on and off. The LED on the board should
correspondingly switch on and off. If an LED does not react, then probably
the issue is with the LED pin, which should be set to a correct value.
Go to the mDash "Devices" tab, click on the device settings, choose "Shadow".
Set the `state.desired.pin` in the shadow editor and save:
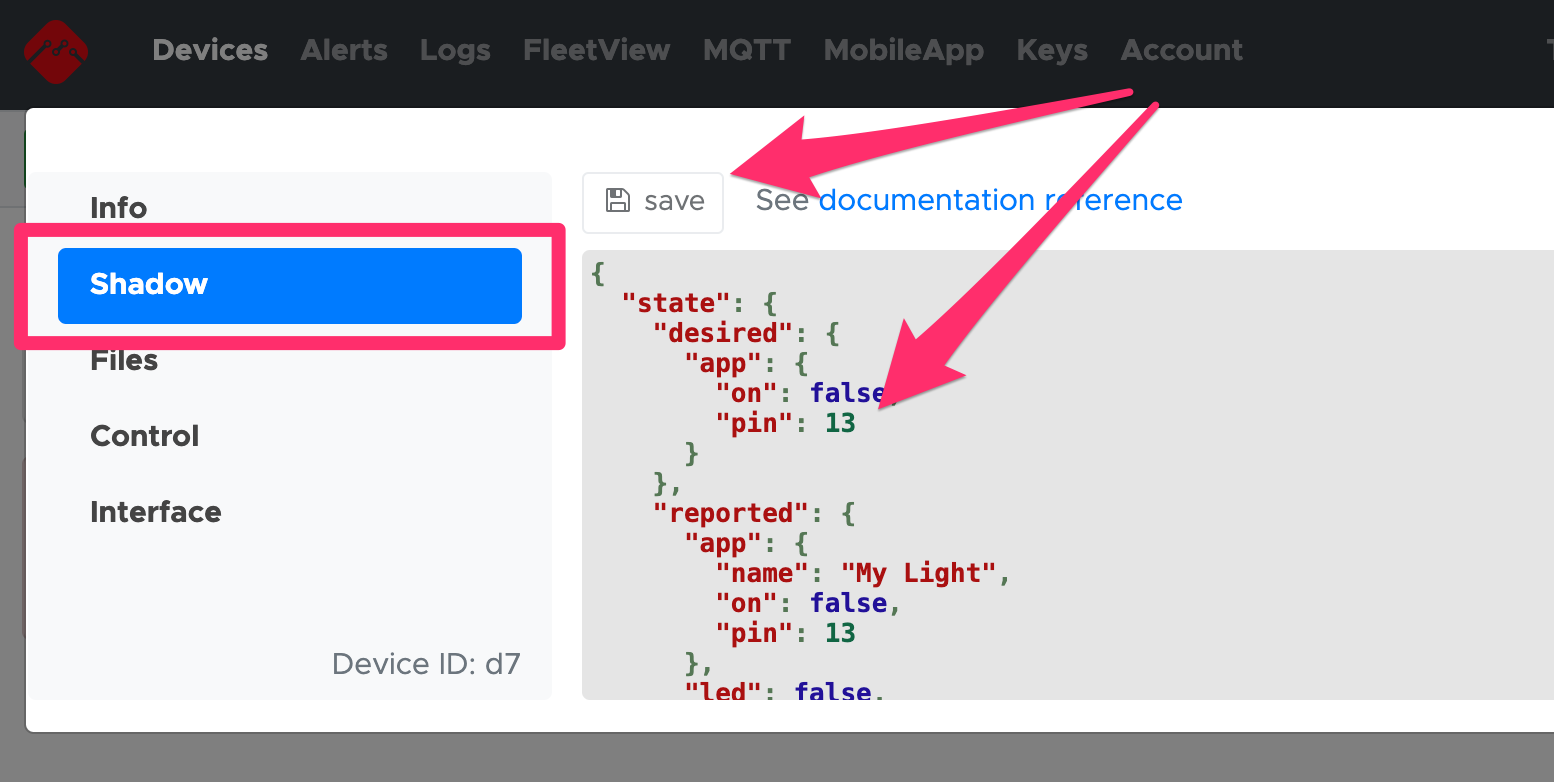 When done, the board should react on the toggle as expected. When you
toggle the LED, notice now the shadow changes. First, a mobile app changes
`state.desired.led`. Then mDash sends a delta to the device. A device
sets the LED and updates the shadow, changing `state.reported.led`:
When done, the board should react on the toggle as expected. When you
toggle the LED, notice now the shadow changes. First, a mobile app changes
`state.desired.led`. Then mDash sends a delta to the device. A device
sets the LED and updates the shadow, changing `state.reported.led`:
 ### 9. Next steps
You have an end-to-end working implementation in front
of your eyes now, which you can change iteratively.
You can start implementing your own product, launch and sell it to
your customers.
We suggest to concentrate on the most important pieces of your product:
the physical device itself, and an end-user interface.
If you have any questions, drop us an email at support@cesanta.com,
or simply use the online chat button below.
Let's launch together. Good luck!
### 9. Next steps
You have an end-to-end working implementation in front
of your eyes now, which you can change iteratively.
You can start implementing your own product, launch and sell it to
your customers.
We suggest to concentrate on the most important pieces of your product:
the physical device itself, and an end-user interface.
If you have any questions, drop us an email at support@cesanta.com,
or simply use the online chat button below.
Let's launch together. Good luck!